More than 90% of cyber-attacks start with fake emails. Attackers mimic trusted domains and send mailcious emails to trick users into clicking links or sharing sensitive data. If this happens, the brand may lose trust, suffer financial losses and damage its reputation. Companies need powerful means to prove their emails are real. This is DMARC where comes in . DMARC helps receiving mail severs verify that emails truly come from the sender's domain. It makes spoofing more difficult and improves email delivery rate. This guide explains what DMARC is , how to integrate with SPF/DKIM, and how to configure it in five simple steps. You can also learn how to read the DMARC report and step-by-step transition to full protection.
Quick Summary: How to Set Up DMARC

What Are DMARC Records?
A DMARC record is a DNS TXT record stored in the domain's DNS settings. It instructs mail services such as Gmail, Outlook, Yahoo, etc. how to respond when incoming mail fails SPF or DKIM check.
DMARC Definition
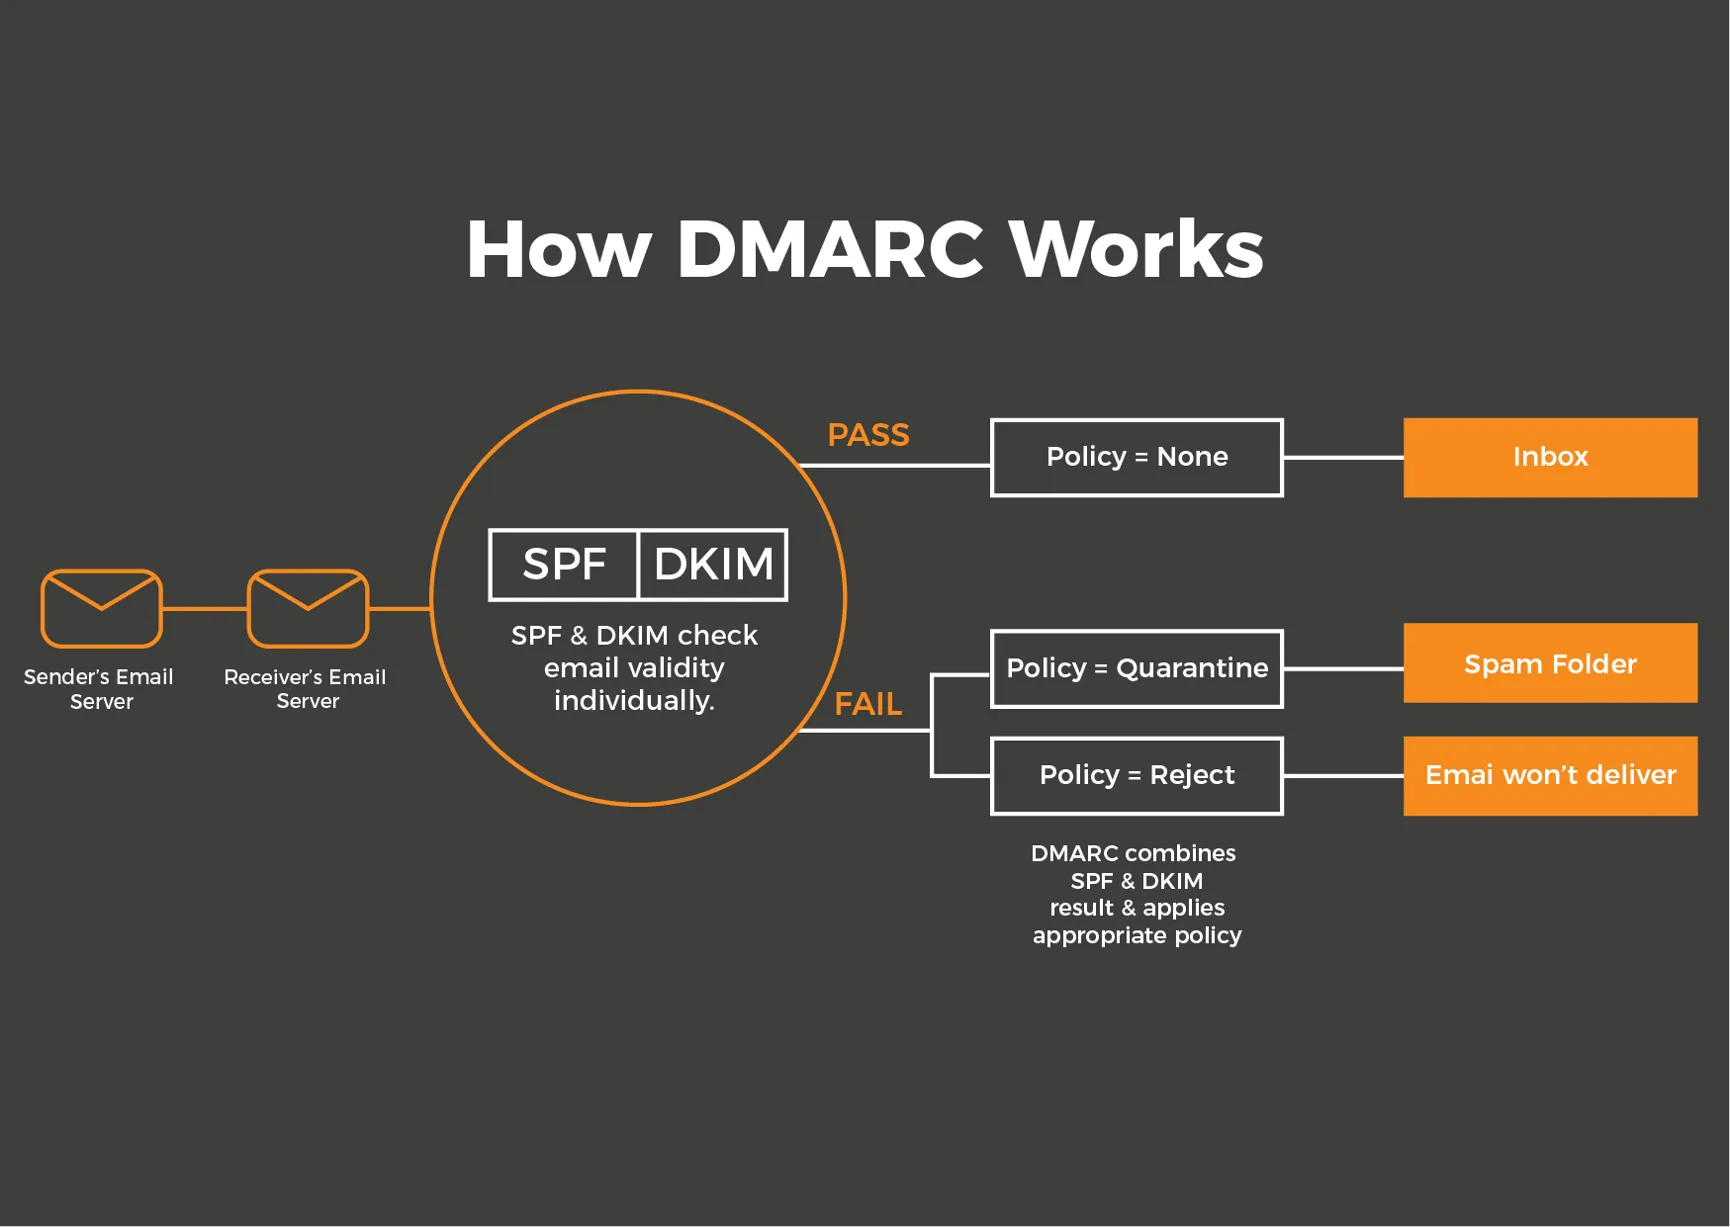
DMARC (Domain-Based Message Authentication, Reporting, and Conformance) is a policy that specifies how the receiving server should handle "mail under the guise of its own domain" that does not pass email authentication.
Purpose of DMARC
DMARC supports:
- Prevent attackers from fake email delivery that exploit their domains
- Protection of brand reputation
- Increase delivery rate for recipients to trust authenticated emails
- Retrieve reports on sender exploiting their domain
Key DMARC Term: p=policy
The DMARC policy instructs the mail server how to handle unauthorized messages.
| Policy | Meaning |
|---|---|
| p=none | Monitor only; no blocking. |
| p=quarantine | Send suspicious emails to spam. |
| p=reject | Block suspicious emails completely. |
Many companies start at p = none, move to quarantine after monitoring, and eventually to refuse.
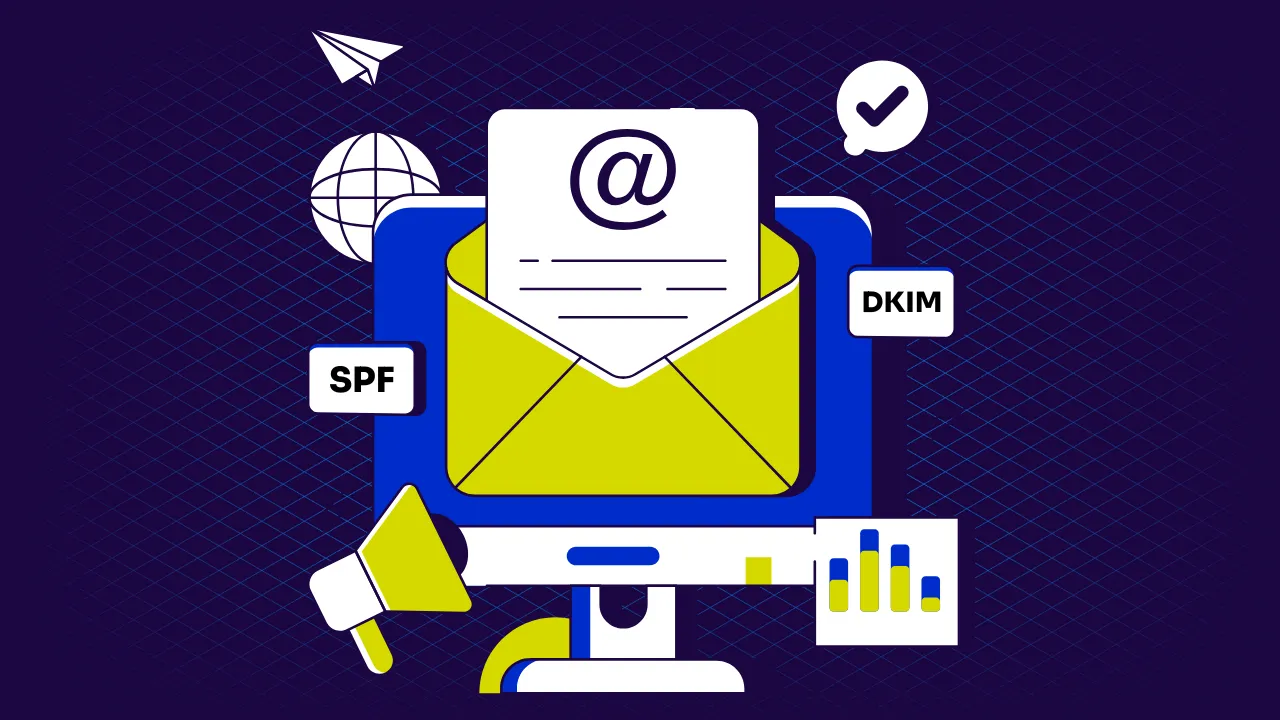
How DMARC Works With SPF and DKIM
DMARC works with SPF and DKIM to verify the identity of the email delivery. The SPF verifies the reliability of the sending server and DKIM confirms that the message has not been modified. DMARC verifies both results and determines what actions to take. This collaboration prevents false mail and improves delivery rate.
SPF: Validates Sending Servers
The SPF checks whether the mail was sent from the server the domain approved. Create an SPF record listing the authorized source. When an unknown or fake server sends an email, the SPF marks it suspicious. This allows you to block spoofing emails before they reach the user.
DKIM: Ensures Email Integrity
DKIM confirms that the mail has not been modified after leaving the sending server. Add digital signatures created using private keys to the mail header. The receiving server uses the public key on the DNS to verify the signature. If the message has been modified, DKIM fails and protects the domain from tampering emails.
DMARC: The Final Enforcer
After SPF and DKIM verification, DMARC determines the response in case of failure:
- Permission (p = none)
- Mark as spam (p = quarantine)
- Complete rejection (p = reject)
DMARC notifies the source of the report so you can identify the sender who exploits the domain.
The 5-Step Guide to Set Up DMARC
The DMARC setting is simple if you follow the clear steps. In this 5-step guide, we will explain each step in order from confirming the current email settings to applying full protection. By proceeding in order, you can avoid common mistakes and ensure strong email authentication is applied to your domain.
Step 1: Pre-Deployment Audit (The Foundation)
Before creating a DMARC record, you need to set up your email environment. If SPF or DKIM is not working, DMARC will fail. Make sure everything works smoothly in this step.
Audit Your Current SPF Record
Check your SPF record using a DNS lookup tool. You must confirm:
- The record exists
- It contains all your sending services
- It does not exceed the 10-lookup limit
- There are no "+all" or "?all" mechanisms
A basic SPF record looks like this:
v=spf1 include:mailserver.com -all
If you are using multiple email services such as Office 365, Google Workspace, CRM tools, or newsletter platforms, make sure that each service is listed.
Validate Your DKIM Configuration
Make sure DKIM is valid for all outgoing mail streams. Many mail providers automatically generate DKIM keys, but you need to publish DKIM public keys to DNS.
Check DKIM for:
- Main Mail System
- Marketing Platform
- CRM system
- Transaction Mail Tools
DKIM is valid and must be properly linked to the domain.
Identify All Legitimate Email Senders
List all services that send emails to your domain. This includes:
- Your email provider
- Sales and CRM tools (e.g. HubSpot, Zoho, Salesforce)
- Marketing tools (e.g. Mailchimp, SendGrid)
- Billing system or support system
- Custom Applications
Record the IP address or domain of each service.
This procedure prevents DMARC from blocking legitimate emails later.
Step 2: Generate Your DMARC Record (Policy Creation)
Once the SPF and DKIM settings work correctly, proceed to create a DMARC record. This procedure determines how mail servers should handle messages from their domains. Starting with the right policies allows you to monitor activities, detect problems early, and prepare for future enhancements.
Start With a Monitoring Policy (p=none)
Always begin with p=none.
This tells email receivers to:
- Check SPF and DKIM
- Send you reports
- Allow all emails through for now
This stage helps you collect data without risking email loss.
Example:
v=DMARC1; p=none; rua=mailto:dmarc-reports@yourdomain.com;
Configure Aggregate Reporting (rua)
The rua tag sets the email address to receive daily reports in XML format. The report shows:
- Servers sending emails using their domains
- SPF and DKIM pass/no-rating results
- Total amount of messages sent
Use a dedicated mailbox. Example:
rua=mailto:dmarc@yourdomain.com
Optionally Configure Forensic Reporting (ruf)
Forensic reports display individual failed email delivery samples. Helps detect real attacks quickly.
However, some providers restrict ruf reports by privacy rules.
Example:
ruf=mailto:dmarc-forensic@yourdomain.com
If you want more detailed visibility, you can include this setting.
Step 3: Publish the DMARC Record in Your DNS (Implementation)
After creating a DMARC record, you must add it to your domain's DNS so that your email provider can read and apply the policy. This step enables DMARC. Simply log in to the DNS panel, create a TXT record and paste the DMARC settings. After saving, the policy becomes effective.
Access Your Domain's DNS Management Console
Log in to one of the following:
- Domain Registrar (GoDaddy, Namecheap)
- Hosting Providers (Cloudflare, Hostinger)
- DNS Provider (DNSMadeEasy, AWS Route 53)
Find the option to add TXT records.
Create a New TXT Record for DMARC
The hostname must be:
_dmarc.yourdomain.com
DMARC does not work if you enter other formats.
Enter Your DMARC Record Value
Paste the entire DMARC record you created in step 2.
Basic record example:
v=DMARC1; p=none; rua=mailto:dmarc@yourdomain.com;
Save the record and wait for the DNS update. Propagation may take up to 24 hours.
Step 4: Analyze Reports and Refine Configuration (Monitoring Phase)
This is important because DMARC can be effective for the first time by analyzing reports and taking countermeasures. The report displays the sender, the message that passed or failed to send mail from the domain, and where the issue occurred. You can use this data to fix issues and improve email authentication settings.
Parse and Interpret Aggregate Reports
Aggregate reports are provided in XML format and may be difficult to read manually.
Use the DMARC analysis tool to convert it into a readable graph.
The report shows:
- All servers that send emails to their domains
- Authentication results
- Failure cases and unknown sources
Quickly check if there are suspicious points.
Identify and Authorize Unknown Senders
If an unknown source is emailing the report:
- Verify the possibility of forgetting settings with legitimate services
- Add to SPF or DKIM if legitimate service
- Block if unknown source
This is how DMARC prevents spoofing.
Measure Your Compliance Rate
You need to keep your compliance rate high before moving to a more stringent policy.
Aim for:
- 95%+ alignment for SPF
- 95%+ alignment for DKIM
If the success rate is low, please fix the email authentication issue before proceeding to the next stage.
Step 5: Gradually Enforce Stricter Policies (Live Protection)
You can start applying stronger DMARC policies after monitoring reports and fixing all matching issues. At this stage, only verified email delivery pass through the check, improving actual protection. Step by step avoids the risk of blocking legitimate emails while blocking unnecessary senders.
Transition to a Quarantine Policy (p=quarantine)
Instruct your email provider to treat suspicious messages as spam.
Example:
v=DMARC1; p=quarantine; rua=mailto:dmarc@yourdomain.com;
Monitor the report again for at least 1-2 weeks.
Move to Full Rejection (p=reject)
After stabilization, completely refuse to update the policy.
Example:
v=DMARC1; p=reject; rua=mailto:dmarc@yourdomain.com;
This is the most powerful protection and prevents attackers from exploiting domains.
Maintain Continuous Monitoring
After reaching p = reject:
- Continuous review of daily reports
- Watch out for new services for teams to start using
- Update SPF/DKIM as needed
- Review changes after software updates
DMARC is not over once set. Continuous monitoring is required to maintain safety.
Common Beginner Mistakes to Avoid
It is a common problem that many beginners face when setting up DMARC. These mistakes result in failure to send mail and weakening of protection functions. Fortunately, most are avoidable if you pay attention. Early understanding of these typical errors allows you to set up DMARC smoothly and maintain domain safety.
Skipping SPF/DKIM Setup
If SPF or DKIM is not set, DMARC will not work properly. Since DMARC relies on these results for email delivery verification, both records must be valid. If any is missing, DMARC will mark many messages as unverified, causing delivery problems or making it difficult to protect against domain spoofing.
Using p=reject Too Soon
If you migrate to p = reject without monitoring:
- The possibility of legitimate mail being blocked
- The possibility that the customer cannot receive the message
- The cause of the delivery failure may be unknown
Always start with p = none.
Ignoring DMARC Reports
If you ignore the report:
- Unable to discover potential problems
- Missed attack attempts
- Unable to identify who exploits their domain
- Improvements in integrity become impossible
The report is at the core of DMARC.
Conclusion
DMARC strongly protects your domain from spoofing by applying SPF and DKIM checks to all outgoing emails. Verify that each message is authentic and from an approved source, and realize reliability and improvement of the entire email delivery . The safest approach is to start with p = none, monitor all reports and fix integrity issues. Once everything is stable, you can move to quarantine for full security and eventually to refuse. If you need assistance at any stage, we Aurora SendCloud , email security team will provide you with a free audit. Check the SPF, DKIM and DMARC settings and guide you through the path to complete protection.